Whether you are a student, parent, teacher, or faculty member, you will probably agree that ordering books, stationery, uniforms, and sports equipment can be a challenging process. While it is fairly straightforward to set up a school’s online store using WordPress and WooCommerce, managing the store, fulfilling orders, and communicating with customers can be a challenge. Most schools and universities allow parents and students to purchase books, uniforms, clothing, merchandise, and even event tickets online, however, when it comes to selling in-person and managing online orders, these processes quickly devolve into cumbersome spreadsheets and lengthy email exchanges.
In this guide, we will show you how to implement an omnichannel retail store that will make it possible to sell both online and in-person using a unified system, while simplifying the fulfillment process and automating communications. We will walk you through the steps to set up a WooCommerce omnichannel store for your school or university and implement an effective fulfillment strategy that will streamline textbook purchases, boost school spirit with branded merchandise, and improve overall operational efficiency.
Quick Links
- Sell In-person with a WooCommerce POS (Point of Sale)
- Customizing Order Fulfillment
- Automate Email Communications
- Sell Tickets Online and at your School Events
- Conclusion
Note: This tutorial assumes that you already have a WordPress website with WooCommerce installed
Sell In-person with a WooCommerce POS (Point of Sale)
Selling online is a big first step, but it’s only half the journey. In order to accommodate in-person sales at your premises, you will need to implement a POS (point of sale) solution. This will ensure that you are able to process in-person sales professionally and keep track of new orders, revenue, and customers.
Since you already use WooCommerce to manage your online products, orders, and customers, it only makes sense to implement a WooCommerce POS. A WooCommerce POS such as FooSales is a point of sale (POS) system that integrates directly with WooCommerce and makes it possible to sell WooCommerce products both online and in-person. It will also be used to manage the fulfillment of your online orders and ensure orders are processed and delivered to your customers efficiently and on time.
To get started, sign-up for a 7-day free trial and follow the installation steps.
Once you have created a FooSales account and installed the FooSales WordPress plugin, you can login to the FooSales iPad, Android tablet or web apps using your store administrator details. FooSales will then connect to your site and load all your products, orders and customers. FooSales uses your store’s existing WooCommerce products and tax settings, so as soon as it loads, you will immediately be able to process in-person sales.
Sales and Checkout
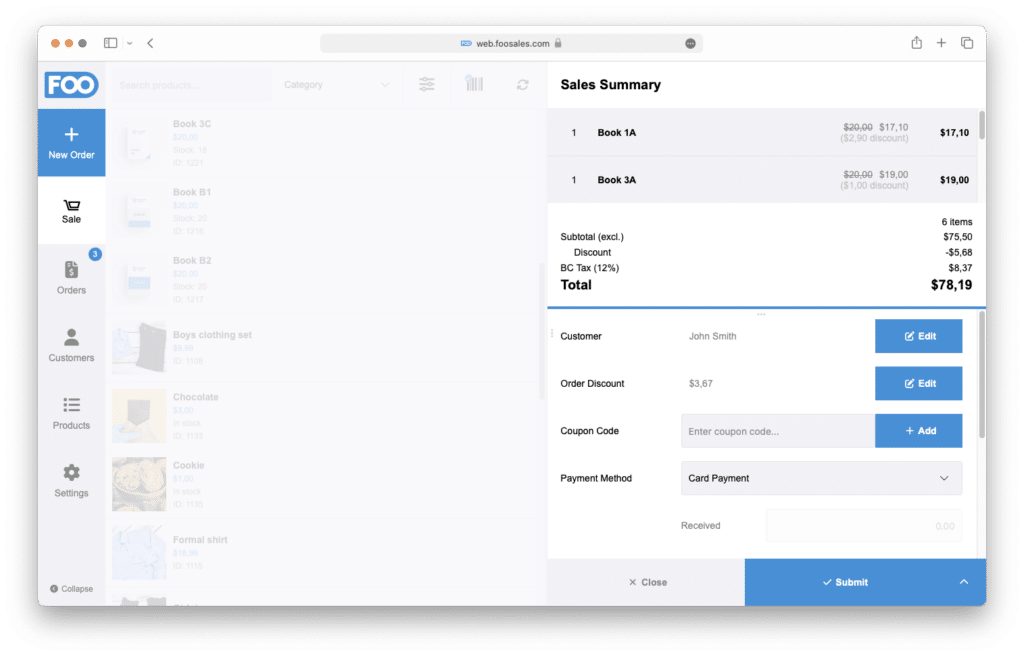
On the default sales screen, you can search and filter your product catalog, or connect a barcode scanner to find a matching product ID or SKU. When processing an order, simply add products to the cart and proceed to the checkout screen. Here you can link the order to a new or existing parent/student profile, apply discounts, apply coupon codes, and add order notes. When you are ready, you can select the relevant payment method and complete the in-person transaction. FooSales will then generate an order directly in WooCommerce. The order can be viewed in the orders section in FooSales, or when viewing orders in the WooCommerce admin dashboard on your WordPress site. Since FooSales uses your existing products and inventory, your online stock availability will automatically be adjusted without having to manually update your stock in WooCommerce.
Order Management
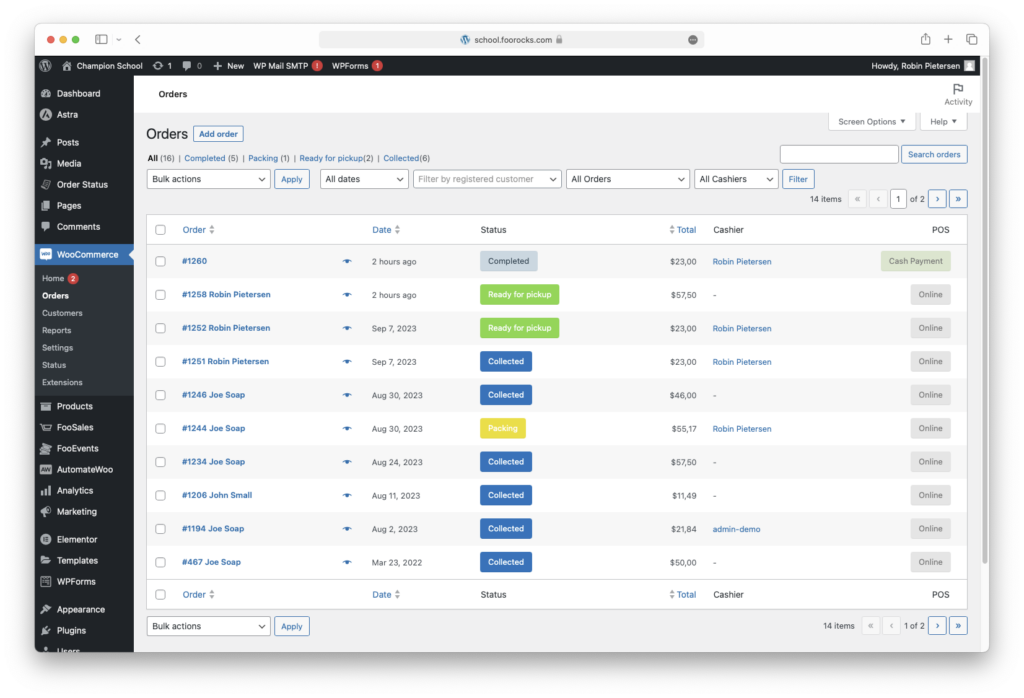
Next, you can navigate to the Orders section. Here you can view both online and POS orders. You can view information related to each order such as the items that were purchased, shipping information, billing details, and order notes. You can also refund an order and modify the status of an order. If an order is set to an incomplete order status such as Processing or On-hold, you can continue the order and process it through the sales cart and checkout.
Customers
Last but not least, in the Customers section, you can modify existing customers (student or parent profiles) as well as create new customer profiles.
Customizing Order Fulfillment
Now that you are able to sell both online and in-person using FooSales, we are going to customize the fulfillment process. As with most schools, when an order is placed online, the parent or student are required to collect the order when it is ready. We are going to implement a workflow to accommodate this that will reduce the possibility of error, save time, and automate communications with the student or parent.
We will use FooSales to manage the various steps associated with successfully fulfilling an order. To achieve this, we need to implement a mechanism that allows us to track each stage of the order fulfillment workflow. WooCommerce supports a number of default order statuses such as Processing, On-hold, and Complete. We are going to implement additional custom order statuses that we will use to track the progress of an order. How this will work, is when an order is placed online, it will be sent to FooSales. Once received, the person responsible for preparing the order will change the order status to a custom status called Packing. When the order is packed and ready, the status of the order will be changed to Ready for pickup. When the customer has collected the order, the status of the order can be changed to Collected which is the final completed stage of an order.
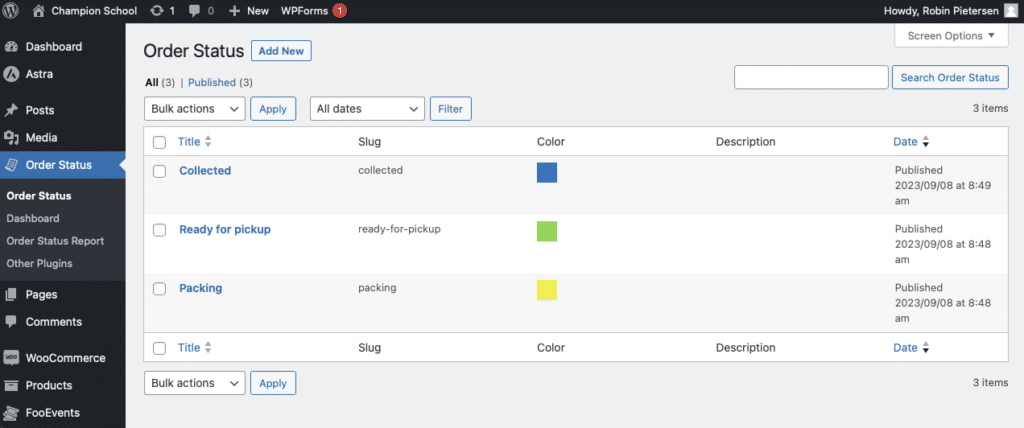
Since FooSales is a native WooCommerce POS, it inherently supports the default and custom order statuses. The are loads of free and paid plugins that can be used to add custom order statuses to your site. We are going to install the free Ni WooCommerce Custom Order Status plugin. Once done, navigate to Order Status > Add New and create the following order statuses:
- Packing
- Ready for pickup
- Collected
Next, we will need to update the FooSales order settings so that the custom order statuses reflect in the FooSales POS apps. Go to FooSales > Settings > Orders. Here you can specify what Order statuses to load in the FooSales POS apps, Order submit statuses at checkout, and orders that are highlighted as Incomplete order statuses.
Once you have configured the order statuses as needed, save these options and head back to the FooSales apps. In order for the new status settings to reflect, go to the Settings section and press the Resync button. This will ensure FooSales fetches the latest order settings and displays orders with the new order statuses.
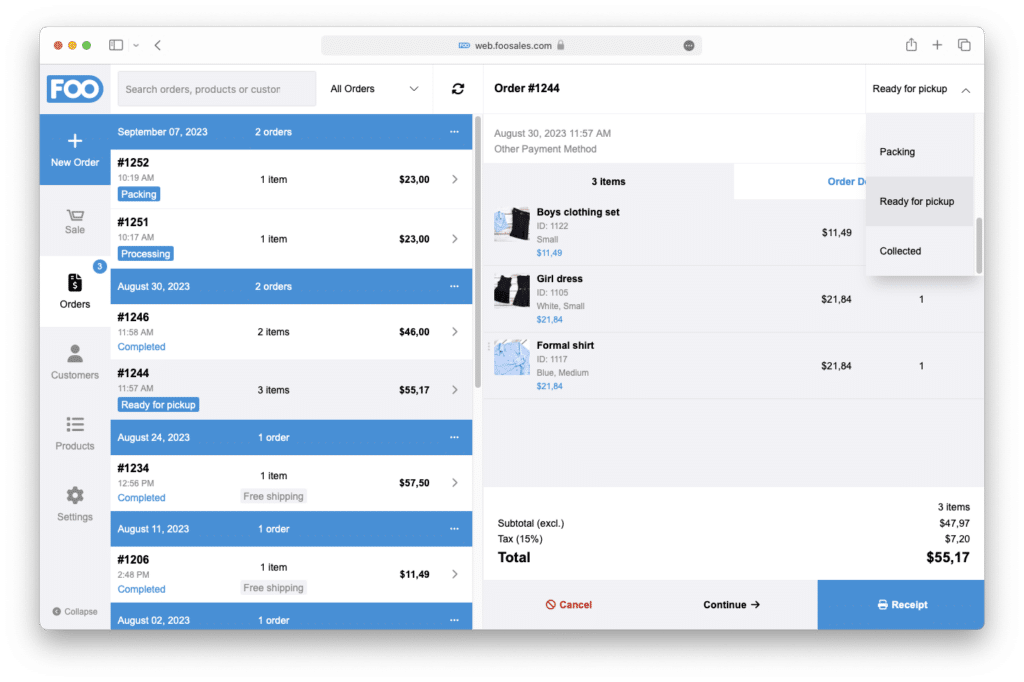
Once the resync is complete, navigate to the FooSales Orders section where you will see all relevant orders. You can now also change the status of an order to Packing, Ready for Pickup or Collected using the order status selector at the top right corner of the order details panel. When the status is changed, FooSales will change the actual order status in the WooCommerce database so anyone viewing the order on another device or through the WordPress dashboard will also see the updated order status.
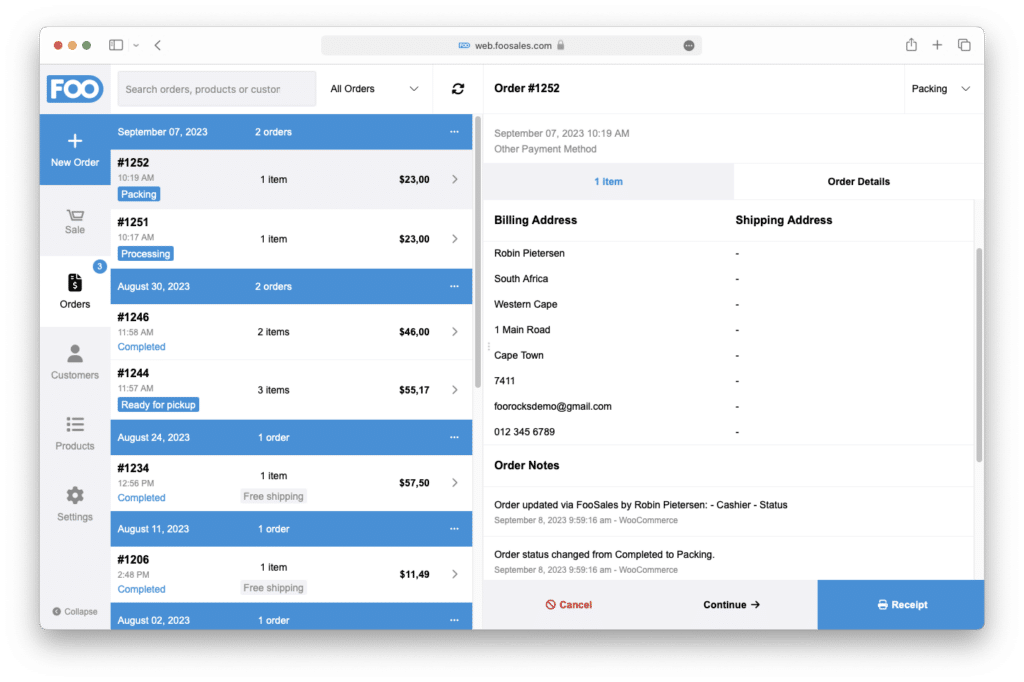
In addition to viewing what items are included in each order (i.e. packing list), you can also view billing details, shipping information, and order notes for each order.
So to recap, when an order is placed online, the order will automatically display in the Orders section in FooSales. The person responsible for preparing the order can view the order in FooSales and change the order status to Packing using the drop-down selector. This status will display on all connected FooSales devices as well as in the WordPress dashboard. When the order is packed and ready, the status of the order will be changed to Ready for pickup. Once the customer has collected the order, the status of the order can be changed to Collected which indicates that the order fulfillment process is complete.
While this guide focuses on orders that are collected from a physical location, a similar workflow can be implemented to manage the fulfillment process for deliveries.
Automate Email Communications
When an order is ready for collection, you would typically need to email, SMS, or call the customer and let them know that the order is ready to be collected. This is a manual process that is not only time-consuming but also susceptible to human error. To save time and reduce the chance of error, we are going to implement an automation that will automatically email the customer when the order status is changed to Ready for pickup. This can be achieved using free plugins like the Ni WooCommerce Custom Order Status plugin, however, we are going to use a paid plugin called AutomateWoo which offers greater flexibility and additional communication methods/actions. You will first need to purchase the AutomateWoo plugin from the WooCommerce Marketplace and install it on your website.
Once installed, navigate to AutomateWoo > Workflows > Add Workflow and enter a title for your workflow (e.g. ‘Ready for pickup email’).
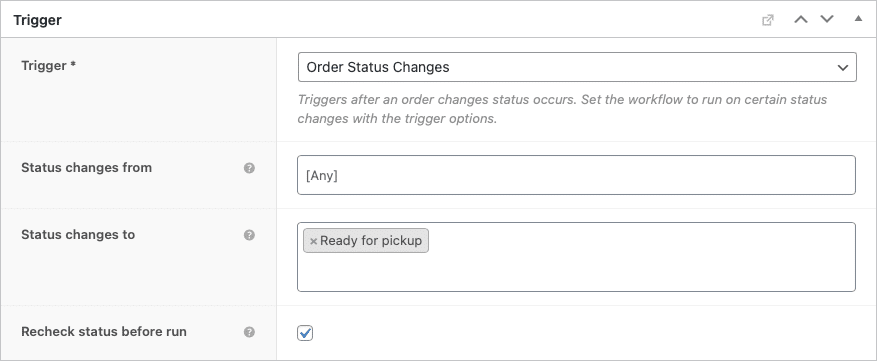
Set the Trigger to Order Status Changes and set Status changes to option to the Ready for pickup custom order status.
This trigger ensures that when the order status is changed to Ready for pickup, a workflow action will be initiated. In the Actions metabox, you can select what type of action should occur in response to the trigger. Set the Action field to Send Email and complete all relevant fields. This email is to be sent to the customer, so you can set the email To field to the customer’s email address using the {{ customer.email }} variable. You can customize the Subject and Email content fields as needed and save. Here is an example:
Now, if you change the order status to Ready for pickup in FooSales, the customer will automatically be sent the following email:
Over time, this will save countless hours and minimize the chance of error. You can also configure AutomateWoo to send SMS’s using Twilio.
Sell Tickets Online and at your School Events
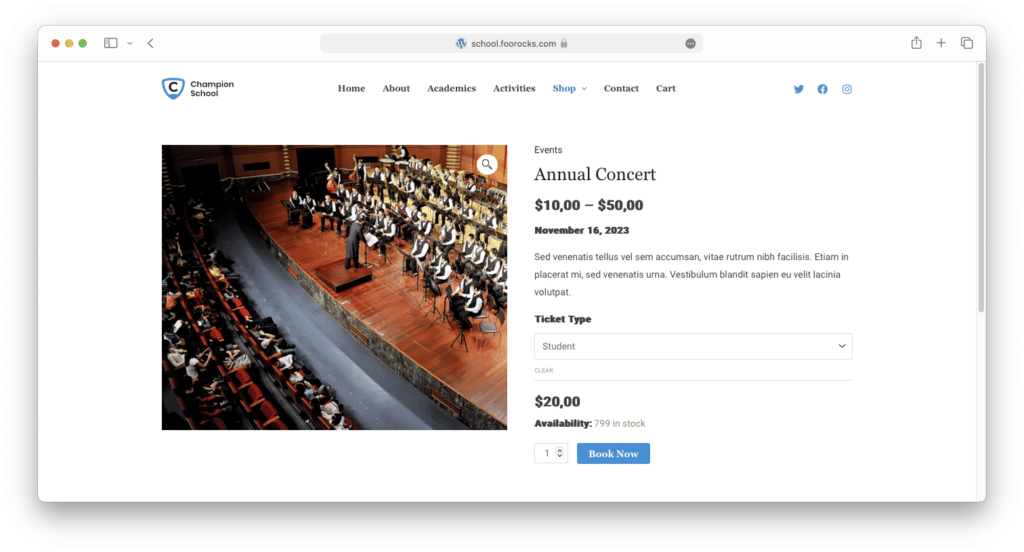
In addition to selling physical goods using WooCommerce and FooSales, you can also sell tickets to your school events using FooEvents for WooCommerce. FooEvents is the #1 platform for selling unlimited tickets directly from any WooCommerce website completely commission-free.
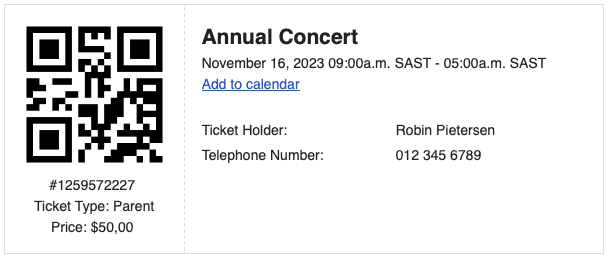
Tickets purchased online are sent as ticket emails which include a unique QR code that can be scanned using the FooEvents Check-ins App.
FooSales integrates directly with FooEvents and allows you to sell and print tickets in-person using FooSales WooCommerce POS.
Conclusion
WooCommerce and FooSales are a great fit for any school or university that wishes to leverage e-commerce and provide convenient services to both parents and students. Implementing an omnichannel store such as the one outlined in this article will save your organization a tremendous amount of time and ensure you have a simple yet effective system that can used by faculty, part-time staff, and volunteers.
Ready to get started, sign-up for our 7-day free trial and get instant access to FooSales WooCommerce POS, no credit card or billing details are required.


